How many times have you heard a yoga teacher say, "Square off your hips,' 'Level off your hips,' 'Stack your hips," or the magical & mysterious "Scoop your tailbone under."? You've probably heard all of those, repeated several times in every class.
Ok, so after awhile you might begin to wonder, "What's this all about? What's the difference & why does it matter?"
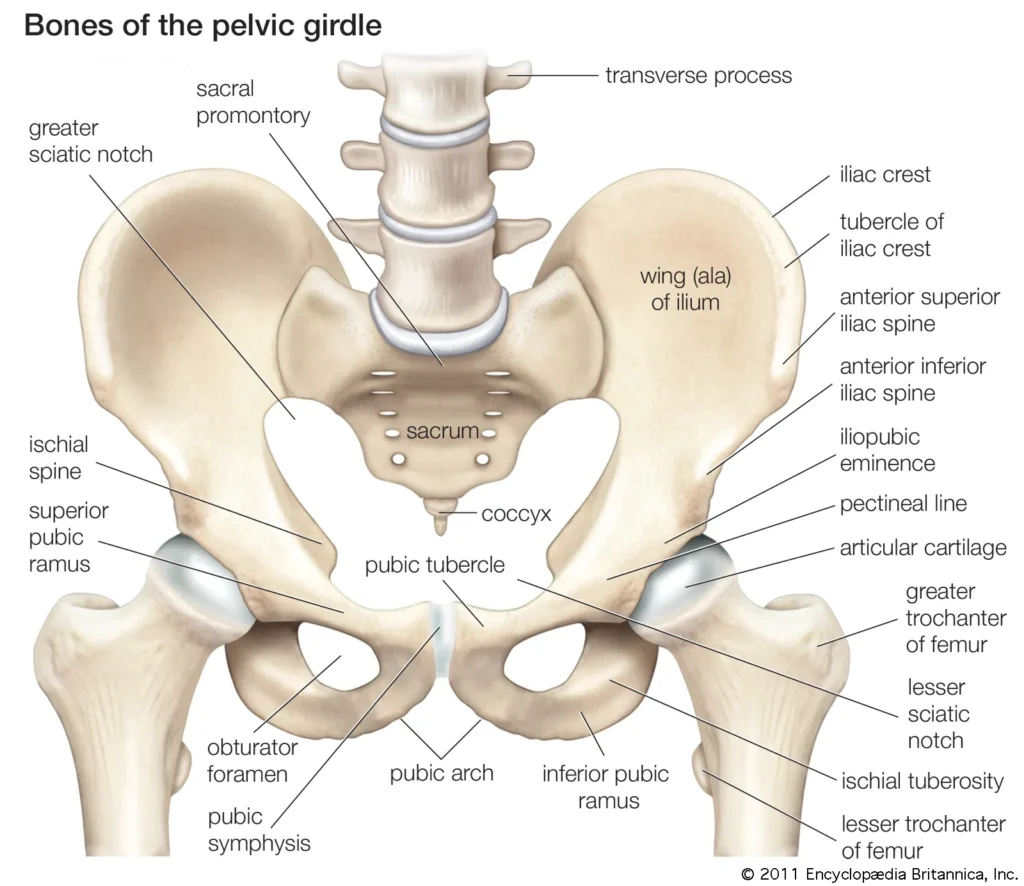
So, let's start off with some simple definitions. And, the most important thing is to understand all of these phrases actually refer to the relationship between muscle tissues & the bones connected to your pelvis (a.k.a. "the pelvic girdle"). Here's a picture to help. (Don't worry! There won't be a quiz at the end. Just something to reference.)
"Closed" & "Open" Hip refer to the orientation of the femur in the hip socket. The degree of hip opening might be the result of several factors; including individual anatomy, injury, or misalignment.
Sitz Bones (a.k.a. “sitting bones”) the bottom part of your pelvis. (Technically, it's the ischial tuberosity just below the ischial spine.) You feel your sitz bones when you sit and weight is pressed onto that part of the pelvis. Three tendons connect the hamstring muscle to the ischial tuberosity.
Hip Points: the top & front of the pelvis. (Technically, the anterior superior iliac spine/crest.) You feel your hip points just below your waste line. When we "hinge forward," we want to anatomically hinge at the hip socket, and you may notice the hip points draw closer to the tops of your thighs (quadricep muscles).
Closed Hip: All 10 toes are pointing forward, both heels are aligned with the sitz bones & aligned with each other. For example, you can stand in Mountain Pose (Tadasana). Notice how your hips are "square", as both hip points are in the same plane & "pointing" in the same direction.
Open Hip: Here's where it starts to get complicated, because almost every yoga posture might serve as a "hip opener." As we age, the three major bones of the pelvis will fuse together, so the movement or opening, refers to the tissues not the bones. The degree of "opening" depends on our unique anatomy & our range of motion. "Opening" can begin when the feet or hip points point in different directions, or when the feet are wider than the hip points.


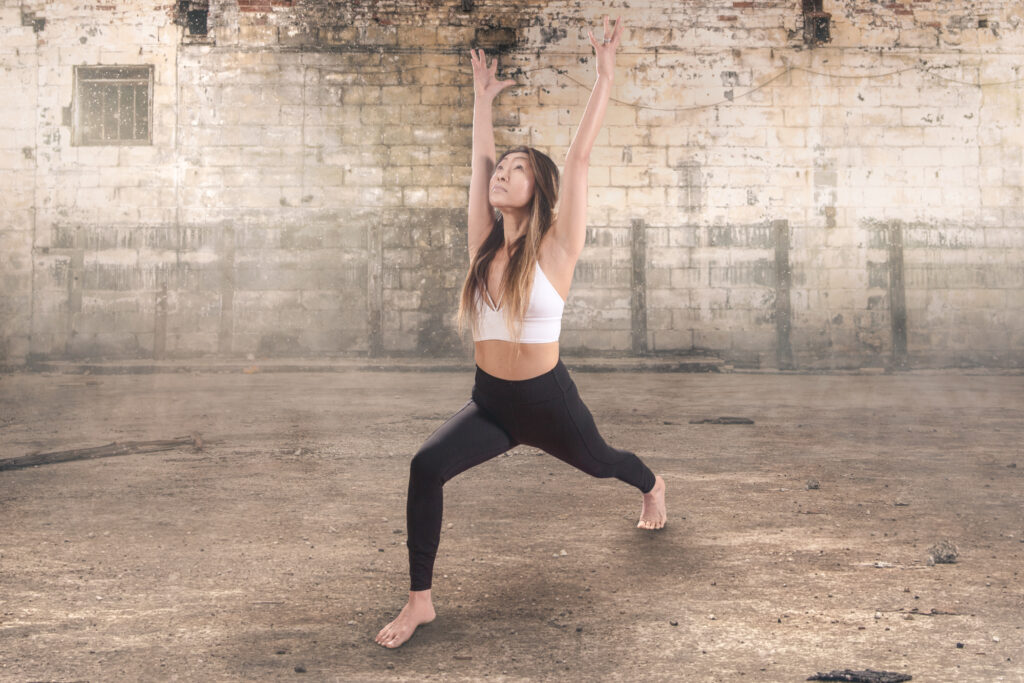
Consider Sky's demonstration of Crescent Lunge (Ānjaneyāsana) in the top picture, here. With the back heel lifted, we have an "open chain" that allows her to square, or close her hip points. Also, notice both feet are aligned with her hip points. This alignment helps to "close" the hips; balancing stability & strength.
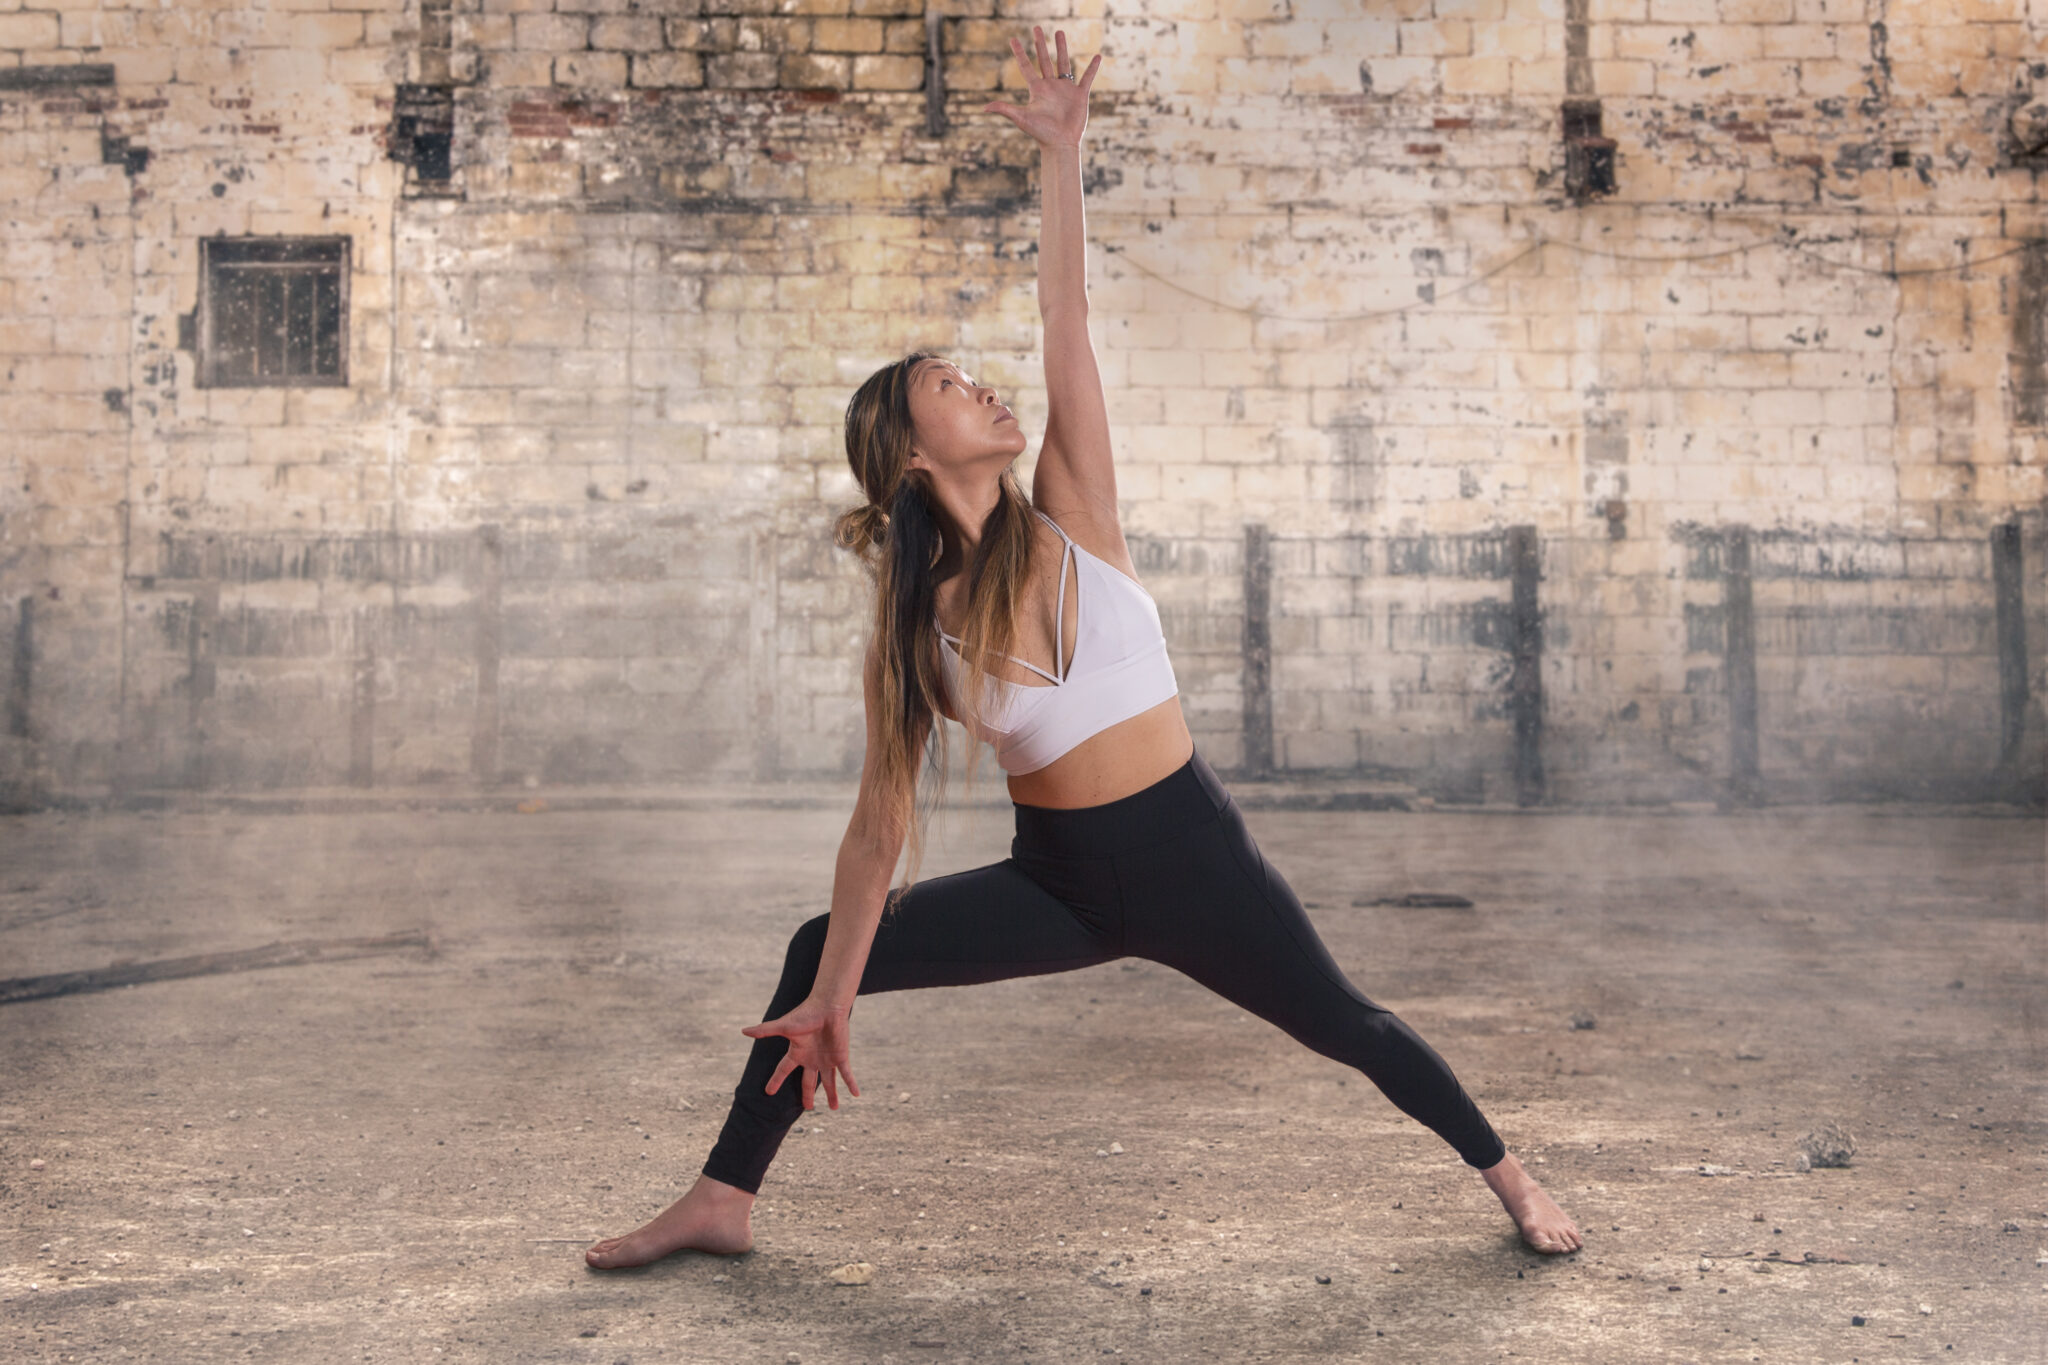
Now, compare the difference in her Bent Knee Triangle (Trikonasana). In this pose, the upper body begins to play a role in the opening. First, recognize her feet are pointing in different directions; pointing her back toes perpendicular to her front foot. She is able to keep her heels aligned, by focusing on stability first. Her flexibility in her hip flexors allows her hips to open. In this variation, she is gently pressing the lower forearm on the inside of her bent leg. This can serve in two ways. You can create an isometric contraction & engage your psoas to build strength. Or, if your hips flexors & psoas are tight, your bent knee might sag in towards your midline. In that case, you might need to work on flexibility before focusing on strength, by gently pressing into your inner thigh to align your bent knee over that foot. As you do, check in & glance down at your knee; rather than up toward the raised hand. Look for your toes to peek-a-boo out from your knee.


Let's take a break! Stand up & try these two postures. Without judgement or comparing yourself to anyone else, just begin to notice the subtleties in your own anatomy, and how it feels to open & close your hip. Play with the width of your stance, in relation to your hip points. And, notice how it feels if you take a wider stride. You can rest your forearm on the bent leg, and really try to engage your psoas. Try a few reps of engaging & relaxing to build strength.
Then, work on the flexibility in your hips. Notice the difference as you deepen the bend in your knee. When do you start to lose mobility in your hips? Back off a little & play with all the variations within these two fundamental postures.
As you practice in the studio, and flow between postures, start to notice how these little variations can impact your experience. Notice if you are working on Stability, Flexibility, or Strength.
Thanks for practicing with us! Stay tuned for the next installment, when we'll explore "closed" & "open" chain, and "scooping our tailbones." These factors play an important role as we shift from standing postures to the floor postures. And, if you missed the posts about your psoas; click HERE and HERE. If you're curious about these & other ways to deepen your practice, ask Matt & Sky about a Private workshop OR APPLY for our next Teacher Training!
We look forward to seeing you practice with us again soon! Click here to sign up now!
